發表文章

目前顯示的是 2018的文章

Intel AERO auto flight (position control mode)

圖片
1. Build a stable visual odometry system (ex: stereo visual odometry) 2. Send the local position to flight controller follows the PX4 coordinate system [1] *PX4 coordinate system [2] : 3. Modify RC mode & position control mode parameters RC mode: 0: Stabilized mode 1: Position mode 2: Altitude mode Position control mode parameters: 4. Active stereo visual odometry system (ssh to TX2 ) and then switch to position control mode. 5. Takeoff and keep the drone manually and try to leave hand on the remote controller. Experimental result: *Parameters for LPE: 1. LPE_FUSION:   4 2. ATT_EXT_HDG_M:  1 3. LPE_VIS_XY: Min value 4. LPE_VIS_Z: Min value Reference: [1]  https://chuangrobot.blogspot.com/2018/12/communicate-with-intel-rtf-flight.html [2]  https://dev.px4.io/en/ros/external_position_estimation.html [3]  https://dev.px4.io/en/advanced/switching_state_estimators.html [4]  https://dev.px4.io/en/ros/external_positi...

Create a customized chessboard for camera calibration

1. Install libharu (1) Download source files [1] (2) Install [2] tar -xvzf libharu-X.X.X.tar.gz  cd libharu-X.X.X mkdir build cmake ../ make sudo make install make clean (3) Download chessboard creation file [3] git clone https://github.com/cgdsss/chessboard.git cd chessboard cd src cmake ../ make (4) Run the executable file ./chesssboard [grid_size(mm)] [length_grid_num] [width_grid_num]                                          (ex: sudo ./chessboard 17 11 8 ) Reference: [1]  http://libharu.org/ [2]  https://github.com/libharu/libharu/wiki/Installation [3]  https://github.com/cgdsss/chessboard

Communicate with Intel RTF flight controller using UART interface (2)

圖片
1. Upgrade firmware to px4 v1.8.1 (1) Download release version directly. [1] (2) Copy the firmware to /etc/aerofc/px4/ and do the update cd /etc/aerofc/px4/ sudo aerofc-update.sh aerofc-v1-default.px4 (3) Check firmware version sudo aero-get-version.py 2. Parameter setting using QGroundControl (presetting for connecting to drone is needed. [2] ) (1) EKF2_AID_MASK: 24 (2) EKF2_HGT_MODE: Vision (or Barometric pressure) (3) SYS_COMPANION: 921600 ( 57600 for TX2 ) *Reboot the drone after modifying parameters 3. Download example [3] git clone https://github.com/rijesha/mavlink-interface cd mavlink-interface git submodule init git submodule update 4. Connect the drone with a UART cable and check serial port name ls /dev/ttyUSB* 5. Modify port name and baudrate in main.cpp #define PORT "/dev/ttyUSB0" #define BAUD 921600 ( 57600 for TX2 ) 6. Build and then run the project make  sudo ./position_controller 7. Result As shown in the following ...

SLAM realization using a stereo camera (Intel R200 RealSense equipped on intel AERO)

1. Flashing the Intel AERO [1][2] Key: (1) Erase Yocto and use all space for Ubuntu (2) Press "shift" + "ESC" for accessing to the GRUB screen (if keyboard and mouse are frozen...) 2. Install RealSense SDK [2] 3. Install ROS [3] 4. Install RTAB-Map [4] 5. Install ORBSLAM2 (1) Pangolin (2) OpenCV (3) Eigen3 6. Make catkin workspace ▪ mkdir -p ~/catkin_ws/src ▪ cd ~/catkin_ws/src ▪ catkin_init_workspace ▪ cd ~/catkin_ws/ ▪ catkin_make 7. Install ORBSLAM2 & ROS Nodes [4] Key: Copy necessary library to correct directory. (Solution for installing ROS Nodes) [5] To do list: (1) Control the intel AERO screen remotely. (like VNC) (2) Completely understand the principle of ORBSLAM2 (3) Send SLAM information to flight controller (mavros) 8. Get camera parameters and save them in a .yaml file [4] 9. Run ORBSLAM2 roscd realsense_camera roslaunch realsense_camera r200_nodelet_rgbd.launch & rosrun ORB_SLAM2 R...

PIxhawk Pilot Support (PSP) configuration (Linux 16.04 with Matlab 2017b)

圖片
1. Download Pixhawk Support Package and install it [1] (1) Open Matlab (2) Change Matlab file directory to the path of  "PX4PSP_v3......" (3) Click and install 2. Set linux build environment (1) Install gcc-arm-none-eabi v5.4. wget https://github.com/SolinGuo/arm-none-eabi-bash-on-win10-/raw/master/gcc-arm-none-eabi-5_4-2017q2-20170512-linux.tar.bz2 tar -jxf gcc-arm-none-eabi-5_4-2017q2-20170512-linux.tar.bz2 exportline="export PATH=$HOME/gcc-arm-none-eabi-5_4-2017q2/bin:\$PATH" if grep -Fxq "$exportline" ~/.bashrc; then echo " GCC path already set."; else echo $exportline >> ~/.bashrc; fi . ~/.bashrc (2) Install dependencies source ubuntu_sim_common_deps.bash 3. Create a empty folder for storing the firmware ex:  4. Build firmware  (1) Run the PixhawkPSP setup UI from MATLAB PixhawkPSP('/home/namikilab/PX4_simulink') (2) Click "Download Firmware" (3) Select Cmake configuration y...

Matlab 2017b installation (linux)

圖片
1. Create a folder with all installation files (1) MATLABR2017b_Linux_Crack (2) install_key.txt (3) R2017b_glnxa64.iso ->  Download 2. mount R2017b_glnxa64.iso and install (refer to install_ket.txt) sudo mount -t auto -o loop R2017b_glnxa64.iso /temp cd temp sudo ./install 3. After installation, copy licences to specific directories... cd MATLABR2017b_Linux_Crack/ sudo cp  license_standalone.lic /usr/local/MATLAB/R2017b/licenses/  sudo cp  libmwservices.so /usr/local/MATLAB/R2017b/bin/glnxa64/ 4. Unmount sudo umount temp 5. Run cd /usr/local/MATLAB/R2017b/bin sudo ./matlab Reference: 1. ubuntu16.04安装MATLAB R2017b步骤详解(附完整破解文件包)

Matlab Pixhawk Support Package installation (Windows)

圖片
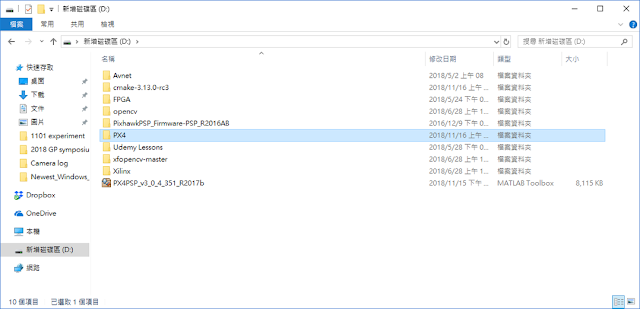
1. Download the pixhawk support package [1] 2. Open MATLAB R2017b and navigate to the file location. 3. Click "PX4PSP_v3_0_4_351_R2017b" and install it 4. Create a folder for firmware download path (ex: D/PX4) 5. Setting bash environment for windows 10 [2]  (1) Active "Windows subsystem for linux" (2) Download and install Ubuntu (3) Using the terminal like in Ubuntu environment ex: 6. Install all necessary toolchain with " windows_bash_nuttx.sh " [3] or using Cygwin Toolchian [4] or [5] (python27 would show in following folder) 7. Key in command " PixhawkPSP(' D:\PX4 ') " in the Matlab 8. Make sure windows 10 bash and python path are correct => Validate paths 9. Download firmware to the folder we specify before and then validate firmware. 10. Selecting cmake configuration [6] 11. Build firmware *Error: make command not found   Solution: [7] T...

Communicate with Intel RTF flight controller using UART interface (1)

1. Make a connection cable between PC and drone [1] Intel RTF (DF13 6pin) PC (TTL to USB) 1 VCC 1 GND (BLACK) 2 UART TX 2 CTS (BROWN) 3 UART RX 3 VCC (RED) 4 I2C CLK 4 UART TX (ORANGE) 5 I2C SDA 5 UART RX (YELLOW) 6 GND 6 RTS (GREEN) 2. git clone C-UART Interface example [2] 3. git clone Mavlink library v2 to path /Home/c_uart_interface_example/mavlink/include/mavlink [3] 4. Check port name on PC side $ ls /dev/ttyUSB* 4. Build project and execute $ cd c_uart_interface_example/ $ make $./mavlink_control -d /dev/ttyUSB0 Future work: Modify the send or receive messages Reference: [1]  PX4 System Console [2]  C-UART Interface Example [3]  mavlink_c_library_v2

Flashing Jetson Xavier

圖片
1. Download Jetpack 4.1 [1] 2. Flashing the Xavier just like flashing TX2 [2] *If fails to install OpenCV or CUDA with the same problem as shown in the following picture Solution: Key in ps aux | egrep -v '(dnsmasq|grep)' | egrep --color=never '(apt|dpkg)' on the Xavier terminal. [3] 3. Check if everything has been installed correctly. [4] *sudo rm /var/lib/dpkg/lock-frontend *apt --fix-broken install *sudo apt-get install XXX 4. Copy the visionworks sample to ~/ and build [5] 5. Change nvpmode to 0 which enables 8 cores and test the samples [6] 6. Maximize the Jetson Xavier performance [7] sudo ${ HOME } /jetson_clocks.sh *If previous projects could not execute normally (report error:  no CUDA-capable device is detected ), it's necessary to renew the NVIDIA driver [8] or manually modify some related scripts. [9] Reference: [1]  https://developer.nvidia.com/embedded/jetpack [2]  JetPack 4.1 - NVIDIA Jetson AGX Xavier [3]  ...

Using OpenCL in a nsight developing environment

圖片
1. Installation:  ubuntu14.04安装intel openCL ,  Ubuntu16.04 安装OpenCV&OpenCL ,  Generic ubuntu packages for OpenCL ,  Install Proprietary Nvidia GPU Drivers On Ubuntu 16.04 / 17.10 / 18.04 Check the installation result by keying in command: nvidia-settings  *Do not need to install the OpenCL library for CPU. *GPU driver choose the newest 410.66. *Type " sudo apt-get remove beignet*" while reporting "X server found. dri2 connection failed!" 2. Copy libOpenCL.so present in your cuda toolkit (lib64) to the above location. ex:  sudo cp /usr/local/cuda-9.0/lib64/libOpenCL.so /usr/lib 3. Setting the path of head file. (/usr/include/CL/...) Reference:  OpenCL: 从零开始学习OpenCL开发 ,  OpenCL 教學(一)

IDS USB camera user guide

1. Download "IDS Software Suite 4.90.06 for Linux" and install [1] 2. Start the uEye daemon by typing sudo /etc/init.d/ueyeethdrc start 3. Adjust lens using demo application ( /usr/local/share/ueye/bin ) 4. Download samples [2] 5. Build a project in nsight editor include: /usr/inlude/ueye.h library: /usr/lib/libueye_api.so Reference: [1] https://en.ids-imaging.com/tl_files/downloads/uEye_SDK/readme/ueye-linux-readme-49006_EN.html#installation [2] https://en.ids-imaging.com/programming-examples.html

Intel RTF auto takeoff and landing using stereo visual odometry via mavlink

Method1: MavROS Step1: Install ROS [1] Step2: Download and run PX4 Gazebo simulator ( Install the development toolchain! [2] ) Step3: Create ROS workspace, make and run ROS node ( fcu_url:="tcp://192.168.8.1:5760" ) Think: How to revise the following part to the result of stereo VO ? geometry_msgs::PoseStamped pose; pose.pose.position.x = 0; pose.pose.position.y = 0; pose.pose.position.z = FLIGHT_ALTITUDE; ***模仿*** 1.  https://github.com/OsloMet1811/Digital-Twin/tree/master/drone_mocap 2.  https://www.youtube.com/watch?v=iysofezsteA 3.  https://github.com/PX4/Firmware/issues/6364#issuecomment-410481134 4.  https://github.com/mavlink/mavros/tree/master/mavros_extras Install VRPN: 1.  Compiling 2.  https://github.com/vrpn/vrpn/wiki/Writing-Servers Parameters for Intel RTF: 1. State estimator: EKF2 2. Mavlink pose data: ATT_POS_MOCAP 3. EKF2_AID_MASK: 8 4. EKF2_HGT_MODE: Vision 5. EKF2_EV_DELAY: 30ms Reference: 1.  ...

Install ROS on ubuntu 16.04

1. Setup your sources.list and set up your keys  sudo sh -c 'echo "deb http://packages.ros.org/ros/ubuntu $(lsb_release -sc) main" > /etc/apt/sources.list.d/ros-latest.list'  sudo apt-key adv --keyserver hkp://ha.pool.sks-keyservers.net:80 --recv-key 421C365BD9FF1F717815A3895523BAEEB01FA116  2. Installation  sudo apt-get update  sudo apt-get install ros-kinetic-desktop-full  3. Initialize rosdep  sudo rosdep init  rosdep update  4. Environment setup  echo "source /opt/ros/kinetic/setup.bash" >> ~/.bashrc  source ~/.bashrc  5. Dependencies  sudo apt-get install python-rosinstall python-rosinstall-generator python-wstool build-essential -------------------------------------------------------------------------------------------------------------------------- If errors occur like following status: http://archive.ubuntu.com/ubuntu/dists/trusty-security/main...

Getting Started with ODROID-XU4

圖片
1. Installing a new OS onto the memory card 2. Boot up the ODROID-XU4 (Be patient....) 3. Delete "lock" file located at /var/lib/apt/lists/ sudo rm -R /var/lib/apt/lists/lock 4. Update & Upgrade Reference: User manual (paper),  odroid-xu4-user-manual.pdf ,  https://wiki.odroid.com/odroid-xu4/odroid-xu4    5. Install Compute Library (version 18.08) Reference:  ComputeLibrary ,  https://www.cnx-software.com/2018/05/13/how-to-get-started-with-opencl-on-odroid-xu4-board-with-arm-mali-t628mp6-gpu/ Keypoint1: While setupping the vender ICD file, command should be: sudo sh -c 'echo "/usr/lib/arm-linux-gnueabihf/mali-egl/libOpenCL.so" > /etc/OpenCL/vendors/armocl.icd' Keypoint2: While building the sources, command should be: scons Werror=1 -j 2 debug=0 neon=1 opencl=1 embed_kernels=1 os=linux arch=armv7a build=native 6. Install OpenCV (The part of "BUILDING ON UBUNTU") Reference:  (1)  https://github.com/cesco345/Open...

Intel RTF with PX4FLOW

Reference:  INTEL AERO DRONE - ALTITUDE AND POSITION HOLD USING PX4FLOW Keypoints: 1. PX4FLOW calibration: (1) Install PX4 toolchain ex: sudo apt-get install gcc-arm-none-eabi & sudo apt-get install build-essential Reference: https://github.com/travisgoodspeed/md380tools/issues/103 (2) Clone the source git clone https://github.com/PX4/Flow cd flow  make all  make upload-usb (3) Connect PX4FLOW with PC using USB cable, update will finish automatically (4) Open QGroundControl (5) Focusing the lens (6) Set parameters ( BFLOW_F_THLD: 10, BFLOW_V_THLD: 7000) Reference:  https://docs.px4.io/en/sensor/px4flow.html ,  https://github.com/PX4/Flow ,  http://ardupilot.org/copter/docs/common-px4flow-overview.html Fly with altitude holding mode ! *Tools for flight Log Analysis:  pyFlightAnalysis, FlightPlot, ... (1) Get flight log file from /var/lib/mavlink-router/ (*.ulg for PX4 or *.bin for ArduPilot) (2) Ana...

Intel RTF calibration

1. Power on Intel RTF ( Do not change wifi setting ) 2. PC connect to wifi named: AERO -xxxxxx 3. Revise PC's IP address in qgc.conf file ( /etc/mavlink-router/config.d ) 4. Restart the router 5. Open QGroundControl and follow the calibration steps as tips cd /Downloads chmod +x ./QGroundControl.AppImage ./QGroundControl.AppImage

Keypoints while Installing ubuntu16.04 on msi

1. Turned off Fast Boot in UEFI (Press Delete button) 2. Replace "quiet splash" with nomodeset 3. Install nvidia driver sudo add-apt-repositorty ppa:graphics-drivers/ppa sudo app-get update sudo app-get install nvidia-387 Reference: (1)  https://askubuntu.com/questions/949496/installing-ubuntu-16-04-on-msi-ge72mvr-system-freezes-when-i-restart (2)  https://ubuntuforums.org/showthread.php?t=2389372 (3)  https://www.tecmint.com/install-nvidia-drivers-on-ubuntu/

Intel RTF auto flying using dronecore SDK

圖片
1. Installation (1) Install the dependencies (2) Clone the DronecodeSDK repository (3) Checkout the release/branch (4) Update the submodules: (5) Build the (debug) C++ library (6) System-wide Install make clean #REQUIRED! make default sudo make default install # sudo required to install files to system directories! # First installation only sudo ldconfig # update linker cache *Head files and library path: /usr/local Reference: https://sdk.dronecode.org/en/contributing/build.html 2. Building the Examples (1) cd /home/DronecodeSDK Ex: cd example/takeoff_and_land/ mkdir build && cd build cmake .. make 3. Build project in Nsight for simulation (1) Setting head files and library path (2) Copy source code of example: takeoff_and_land offboard_velocity to Main.cpp (3) Revise communication part:  connection_url = "udp://:14540"; (4) Setting up a simulator Ex: jMAVSim (pre-installation is needed: jMAVSim/Gazebo Simulation...

Transplant a project from nsight to SDx and execute on a Xilinx FPGA board

1. 使用reVISION (xfOpenCV library) 若要用Stereo vision sample, 需有ZCU 102 / ZCU 104. Reference: (1)  使用Xilinx SDSoc在Xilinx zcu102开发板上编程HelloWorld (2)  Xilinx SDSoc 加载opencv库 2. 自定義加速函式 Reference:  xilinx_embedded_vision_acceleration 3. 使用OpenCV library (待測試...) Reference: (1)  SDx+yocto+OpenCV3.1+FPGA (2)  想在SDSoC中用OpenCV搞事情?来,用Zybo-Z7传授你入门秘籍! 4. 於FPGA board 建構linux作業系統 Reference: (1)  CH01基于Ubuntu系统的ZYNQ-7000开发环境的搭建 (2)  CH02基于ZYNQ的嵌入式LINUX移植

雙眼視覺校正

記錄從raw image到depth map的工具及步驟。 (目的: 得到像直接使用ZED Camera SDK一樣的校正後影像及深度圖) [MATLAB (Stereo camera calibration)] 事先準備好左右相機的各角度拍攝校正板之影像,輸入APP即可得到Camera Matrix。 Reference:  Image Acquisition Toolbox  (可用來開啟XIMEA Camera) ステレオ キャリブレーション アプリ stereoCameraCalibrator Camera Calibration Toolbox for Matlab [OpenCV] Step1: Capture and save raw L/R images with chessboard in a folder. Step2: Calibration. Reference: Capture image , (1) StereoCapture.cpp Save image stereocalibrate.cpp (2) zed-opencv-native [Sum up of calibrating a XIMEA stereo camera] 1. Capture and save raw L/R images with chessboard in a folder. (nsight: Camera_realtime project) 2. Open Matlab input: stereoCameraCalibrator 3. Choose L/R images path and chessboard width (ex:23mm) 4. Click calibrate 5. Click Export camera parameter -> generate MATLAB script *Command: " cameraCalibrator" for single camera calibration

3ds Max

Resource:  http://www.cg.com.tw/3dsMax/ 快捷鍵:Alt + W 將視圖最大化, Alt +滑鼠中鍵移動可旋轉視圖 1. Attach Reference:  combine objects in 3D Studio Max 2. ProBoolean Reference:  如何在Poly模型上產生方洞和圓洞 3. 建立補面 Reference:  polygon的三種補面的方式 4. modifier Reference:  https://www.youtube.com/results?search_query=3ds+max+modifier 5. Align Reference:  Align(對齊工具) 講解 6. Slice plane Reference:  Slice Plane Tutorial 7. Extrude 可用2D平面圖來長出3D立體物件 8. 改變物件坐標軸位置 Reference:  How to reset Pivot Point to center of object in 3DS Max

SLAM 學習資源

最重要:  SLAM 完整學習資源 Triangulation 1.  OpenCVの三角測量関数『cv::triangulatepoints』 2.  slambook/ch7/triangulation.cpp Depth map 1.  disparity-map 2.  lsd-slam源码解读第五篇:DepthEstimation 3.  StereoBM 4.  Stereo_Matcher Pnp 1.  slambook/ch7/pose_estimation_3d2d.cpp SFM 1..  Robotic Vision : Sensors, Localization and Control 2.  ORB-SLAM代码详解之SLAM系统初始化 3.  SFM三维重建源码(Matlab)

3D printer 操作步驟 (Lab)

1. 用3ds Max 畫要印的物件,輸出為.STL檔。 2. 於3D printer旁的電腦開啟待印檔案。(UP!) 3. 3D printer Power ON,並連接電腦(USB Port)。 4. 初始化校正。 5. 更換顏色。(取出&插入,測試到顏色正常輸出為止: プリンター設定) 6. 移動物件列印位置。(盡量不要在螺絲孔上) 7. 預覽列印。(可更改輸出設定,如密度) 8. 開始列印。(可忽略跳出警告視窗) 9. 一旦開始列印後即可拔出連接線。

Linux command, C++

1. argc, argv (C++) Reference:  argc-argv.html 2. cp (copy file or folder to another directory) (Linux) Reference:  cp-command 3. vector (C++) Reference:  Vector 4. assert (C++) ex: assert(iTotalNumber < 1000); Means若 iTotalNumber < 1000 則程式可以繼續執行;若iTotalNumber >= 1000 ,則會秀出維護錯誤訊息的字串,並結束程式。 5. chmod (Linux) Revise file property. (chmod 777 file) Reference:  chmod ,  chmod2 6. rm (Linux) For deleting files, folders... Reference:  rm 7. readlink Find file's path ex: readlink -f file.txt 8. clone Copy a data without possibility of interfacing to original parameter. Reference:  clone() 9. Iterator Reference:  iterator 10. reserve Reference:  reserve 11. erase Reference:  erase 12. Gaussian distribution noise Reference:  Gaussian noise 13. const 可用於修飾函數傳遞參數,在函數內不可被改變。 Reference:  const 14. Meaning of "make -jn" Denotes how many threads you w...