發表文章

Communicate with Intel RTF flight controller using UART interface (2)

圖片
1. Upgrade firmware to px4 v1.8.1 (1) Download release version directly. [1] (2) Copy the firmware to /etc/aerofc/px4/ and do the update cd /etc/aerofc/px4/ sudo aerofc-update.sh aerofc-v1-default.px4 (3) Check firmware version sudo aero-get-version.py 2. Parameter setting using QGroundControl (presetting for connecting to drone is needed. [2] ) (1) EKF2_AID_MASK: 24 (2) EKF2_HGT_MODE: Vision (or Barometric pressure) (3) SYS_COMPANION: 921600 ( 57600 for TX2 ) *Reboot the drone after modifying parameters 3. Download example [3] git clone https://github.com/rijesha/mavlink-interface cd mavlink-interface git submodule init git submodule update 4. Connect the drone with a UART cable and check serial port name ls /dev/ttyUSB* 5. Modify port name and baudrate in main.cpp #define PORT "/dev/ttyUSB0" #define BAUD 921600 ( 57600 for TX2 ) 6. Build and then run the project make  sudo ./position_controller 7. Result As shown in the following ...
SLAM realization using a stereo camera (Intel R200 RealSense equipped on intel AERO)

1. Flashing the Intel AERO [1][2] Key: (1) Erase Yocto and use all space for Ubuntu (2) Press "shift" + "ESC" for accessing to the GRUB screen (if keyboard and mouse are frozen...) 2. Install RealSense SDK [2] 3. Install ROS [3] 4. Install RTAB-Map [4] 5. Install ORBSLAM2 (1) Pangolin (2) OpenCV (3) Eigen3 6. Make catkin workspace ▪ mkdir -p ~/catkin_ws/src ▪ cd ~/catkin_ws/src ▪ catkin_init_workspace ▪ cd ~/catkin_ws/ ▪ catkin_make 7. Install ORBSLAM2 & ROS Nodes [4] Key: Copy necessary library to correct directory. (Solution for installing ROS Nodes) [5] To do list: (1) Control the intel AERO screen remotely. (like VNC) (2) Completely understand the principle of ORBSLAM2 (3) Send SLAM information to flight controller (mavros) 8. Get camera parameters and save them in a .yaml file [4] 9. Run ORBSLAM2 roscd realsense_camera roslaunch realsense_camera r200_nodelet_rgbd.launch & rosrun ORB_SLAM2 R...

PIxhawk Pilot Support (PSP) configuration (Linux 16.04 with Matlab 2017b)

圖片
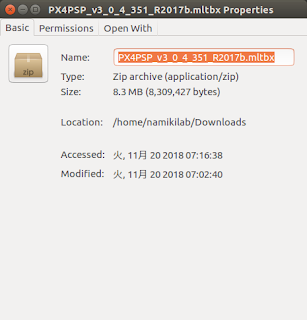
1. Download Pixhawk Support Package and install it [1] (1) Open Matlab (2) Change Matlab file directory to the path of  "PX4PSP_v3......" (3) Click and install 2. Set linux build environment (1) Install gcc-arm-none-eabi v5.4. wget https://github.com/SolinGuo/arm-none-eabi-bash-on-win10-/raw/master/gcc-arm-none-eabi-5_4-2017q2-20170512-linux.tar.bz2 tar -jxf gcc-arm-none-eabi-5_4-2017q2-20170512-linux.tar.bz2 exportline="export PATH=$HOME/gcc-arm-none-eabi-5_4-2017q2/bin:\$PATH" if grep -Fxq "$exportline" ~/.bashrc; then echo " GCC path already set."; else echo $exportline >> ~/.bashrc; fi . ~/.bashrc (2) Install dependencies source ubuntu_sim_common_deps.bash 3. Create a empty folder for storing the firmware ex:  4. Build firmware  (1) Run the PixhawkPSP setup UI from MATLAB PixhawkPSP('/home/namikilab/PX4_simulink') (2) Click "Download Firmware" (3) Select Cmake configuration y...

Matlab 2017b installation (linux)

圖片
1. Create a folder with all installation files (1) MATLABR2017b_Linux_Crack (2) install_key.txt (3) R2017b_glnxa64.iso ->  Download 2. mount R2017b_glnxa64.iso and install (refer to install_ket.txt) sudo mount -t auto -o loop R2017b_glnxa64.iso /temp cd temp sudo ./install 3. After installation, copy licences to specific directories... cd MATLABR2017b_Linux_Crack/ sudo cp  license_standalone.lic /usr/local/MATLAB/R2017b/licenses/  sudo cp  libmwservices.so /usr/local/MATLAB/R2017b/bin/glnxa64/ 4. Unmount sudo umount temp 5. Run cd /usr/local/MATLAB/R2017b/bin sudo ./matlab Reference: 1. ubuntu16.04安装MATLAB R2017b步骤详解(附完整破解文件包)

Matlab Pixhawk Support Package installation (Windows)

圖片
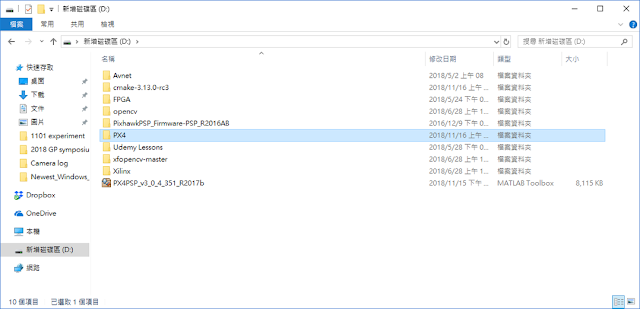
1. Download the pixhawk support package [1] 2. Open MATLAB R2017b and navigate to the file location. 3. Click "PX4PSP_v3_0_4_351_R2017b" and install it 4. Create a folder for firmware download path (ex: D/PX4) 5. Setting bash environment for windows 10 [2]  (1) Active "Windows subsystem for linux" (2) Download and install Ubuntu (3) Using the terminal like in Ubuntu environment ex: 6. Install all necessary toolchain with " windows_bash_nuttx.sh " [3] or using Cygwin Toolchian [4] or [5] (python27 would show in following folder) 7. Key in command " PixhawkPSP(' D:\PX4 ') " in the Matlab 8. Make sure windows 10 bash and python path are correct => Validate paths 9. Download firmware to the folder we specify before and then validate firmware. 10. Selecting cmake configuration [6] 11. Build firmware *Error: make command not found   Solution: [7] T...

Communicate with Intel RTF flight controller using UART interface (1)

1. Make a connection cable between PC and drone [1] Intel RTF (DF13 6pin) PC (TTL to USB) 1 VCC 1 GND (BLACK) 2 UART TX 2 CTS (BROWN) 3 UART RX 3 VCC (RED) 4 I2C CLK 4 UART TX (ORANGE) 5 I2C SDA 5 UART RX (YELLOW) 6 GND 6 RTS (GREEN) 2. git clone C-UART Interface example [2] 3. git clone Mavlink library v2 to path /Home/c_uart_interface_example/mavlink/include/mavlink [3] 4. Check port name on PC side $ ls /dev/ttyUSB* 4. Build project and execute $ cd c_uart_interface_example/ $ make $./mavlink_control -d /dev/ttyUSB0 Future work: Modify the send or receive messages Reference: [1]  PX4 System Console [2]  C-UART Interface Example [3]  mavlink_c_library_v2

Flashing Jetson Xavier

圖片
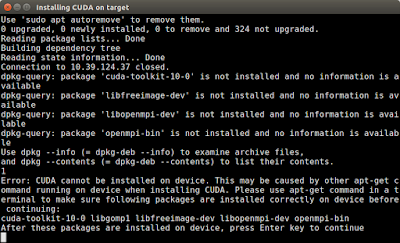
1. Download Jetpack 4.1 [1] 2. Flashing the Xavier just like flashing TX2 [2] *If fails to install OpenCV or CUDA with the same problem as shown in the following picture Solution: Key in ps aux | egrep -v '(dnsmasq|grep)' | egrep --color=never '(apt|dpkg)' on the Xavier terminal. [3] 3. Check if everything has been installed correctly. [4] *sudo rm /var/lib/dpkg/lock-frontend *apt --fix-broken install *sudo apt-get install XXX 4. Copy the visionworks sample to ~/ and build [5] 5. Change nvpmode to 0 which enables 8 cores and test the samples [6] 6. Maximize the Jetson Xavier performance [7] sudo ${ HOME } /jetson_clocks.sh *If previous projects could not execute normally (report error:  no CUDA-capable device is detected ), it's necessary to renew the NVIDIA driver [8] or manually modify some related scripts. [9] Reference: [1]  https://developer.nvidia.com/embedded/jetpack [2]  JetPack 4.1 - NVIDIA Jetson AGX Xavier [3]  ...